
Best car polisher buffer for beginners really comes down to one thing: a tool that forgives mistakes while still giving you a noticeable gloss upgrade on day one.
If you have ever washed a car, stepped back, and still saw haze, light scratches, or dull paint, you already know why a polisher feels tempting. The catch is that the wrong machine, pad, or technique can create more swirls than it removes, and that is usually where beginners get discouraged.
This guide keeps it practical, what types of polishers exist, what to buy in 2026, what pads and compounds make learning easier, and a simple process you can repeat without overthinking it.
What “beginner-friendly” really means in a car polisher
For most people, beginner-friendly does not mean cheap, it means predictable. You want a machine that stays stable, runs smoothly, and does not punish you if your pressure or speed varies a little.
- Low risk of burning paint: A random orbital motion spreads heat and reduces the chance of damage compared with a rotary.
- Easy to control: Comfortable grip, manageable weight, and minimal vibration matter more than peak power.
- Common pad size: A 5-inch backing plate is a sweet spot for learning on modern cars, it fits more curves than 6-inch.
- Consistent speed under load: On harder clear coats, weak machines stall too easily, which wastes time and results look patchy.
According to the International Detailing Association (IDA), proper technique and product selection play a major role in safe paint correction, which is why beginners usually do best with a dual action polisher and a conservative pad and polish combo.
DA vs rotary vs forced rotation: which type should beginners choose?
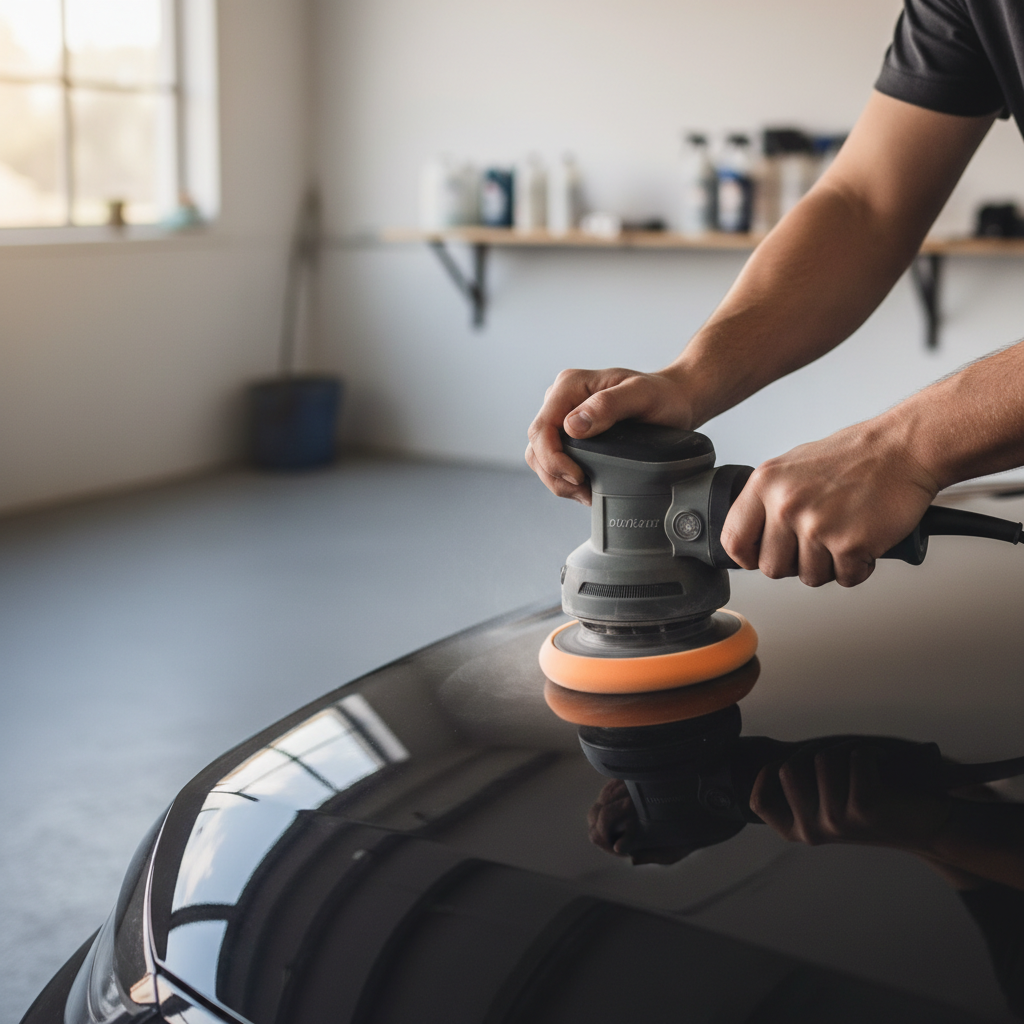
If you are searching for the best car polisher buffer for beginners, you are almost always looking at a dual action polisher, often called a random orbital.
Dual action (random orbital)
This is the safest learning platform. The pad both spins and oscillates, which reduces heat buildup and makes it harder to create obvious holograms.
- Best for: first-time users, daily drivers, light to moderate swirl removal
- Tradeoff: heavy correction can take longer, especially on hard clear coat
Rotary
Rotary machines can correct fast, but they demand more control. It is easier to overheat edges, mark paint, or leave buffer trails if you are not used to managing pressure and pad angle.
- Best for: experienced detailers, severe defects, production work
- Tradeoff: higher risk on thin paint, higher learning curve
Forced rotation DA
These are still DAs, but the pad rotation is driven. They correct more aggressively and stall less, but they can feel “grabby” on curves if you are new.
- Best for: beginners who want faster correction and are willing to practice
- Tradeoff: more fatigue, more technique sensitivity
Quick buyer table: what to look for in a 2026 beginner setup
Specs are easy to compare, but the “feel” of a machine often decides whether you actually enjoy using it. This table keeps the selection grounded in what typically helps a new user succeed.
| Feature | Beginner-friendly target | Why it matters |
|---|---|---|
| Polisher type | Dual action (random orbital) | Lower heat and lower risk of paint damage |
| Backing plate | 5-inch (most common) | More control on curves, wide pad availability |
| Throw (orbit size) | 8–15 mm (typical range) | Balances correction speed and stability |
| Speed control | Multiple speeds + easy dial | Makes spreading vs correcting more manageable |
| Ergonomics | Low vibration, good grip options | Less fatigue, better consistency panel to panel |
| Power source | Corded for home, cordless for mobility | Cordless is convenient, corded usually runs longer |

Pad and polish choices that make learning easier
Many first-timers buy an aggressive compound and a heavy cutting pad, then wonder why the finish looks hazy. A safer path is to start mild and step up only if results stall.
A simple, low-stress combo
- Pad: foam polishing pad (not heavy cut) for most paint
- Product: a medium polish or an “all-in-one” that corrects lightly and finishes well
- Goal: remove most swirls, improve clarity, avoid chasing every defect
When to step up
If your test spot shows little improvement, move to a microfiber cutting pad or a foam cutting pad with a compound, then follow with a finishing step. On some harder clear coats, that two-step approach is normal.
What beginners often underestimate
- Pad cleanliness: a clogged pad cuts poorly and can create micro-marring
- Too much product: more polish often means more haze and more wiping
- Cheap towels: wiping off residue with rough microfiber can re-introduce light marks
Self-check: are you actually ready to polish your car?
Not every car needs correction right now, and not every driveway setup makes the job pleasant. Run through this quick list before you buy anything else.
- You can wash and dry without grinding dirt into paint, using a safe wash method.
- You can work in shade or indoors, hot panels make polishing unpredictable.
- You are okay with “better” instead of “perfect”, at least on the first attempt.
- You can spare 3–6 hours for a first session, rushing is where mistakes happen.
- You plan to protect the finish after, wax, sealant, or ceramic coating (consumer-grade) helps keep results.
If your car has unknown respray work, very thin paint, or existing peeling clear coat, polishing may make things worse. In those cases, it is smarter to get a pro opinion.
Step-by-step: a beginner polishing process that usually works
This is the part most people want, a repeatable routine. It is not fancy, it is just reliable.
1) Wash, decontaminate, and dry
- Wash thoroughly, then use an iron remover if needed (follow label instructions).
- Clay only if the paint feels rough after washing, claying can add light marring.
- Dry fully, water drips can sling product and create mess.
2) Tape sensitive areas
Mask textured plastic trim, badges, and sharp edges. Dried polish stains trim, and edges heat faster.
3) Do a test spot before the whole car
Pick a section on the hood or trunk. Use your mild combo first. This tells you what the paint “likes” without committing to the entire vehicle.
4) Prime the pad, then use less product than you think
- Apply a light, even film for the first pass, then 3–4 small drops per section after.
- Spread at low speed, then bump speed up for correction.
5) Work small sections with steady arm speed
A 2 ft by 2 ft area is manageable. Keep the pad flat, moderate pressure, overlap passes. If the pad starts hopping, reduce speed or pressure and flatten out.
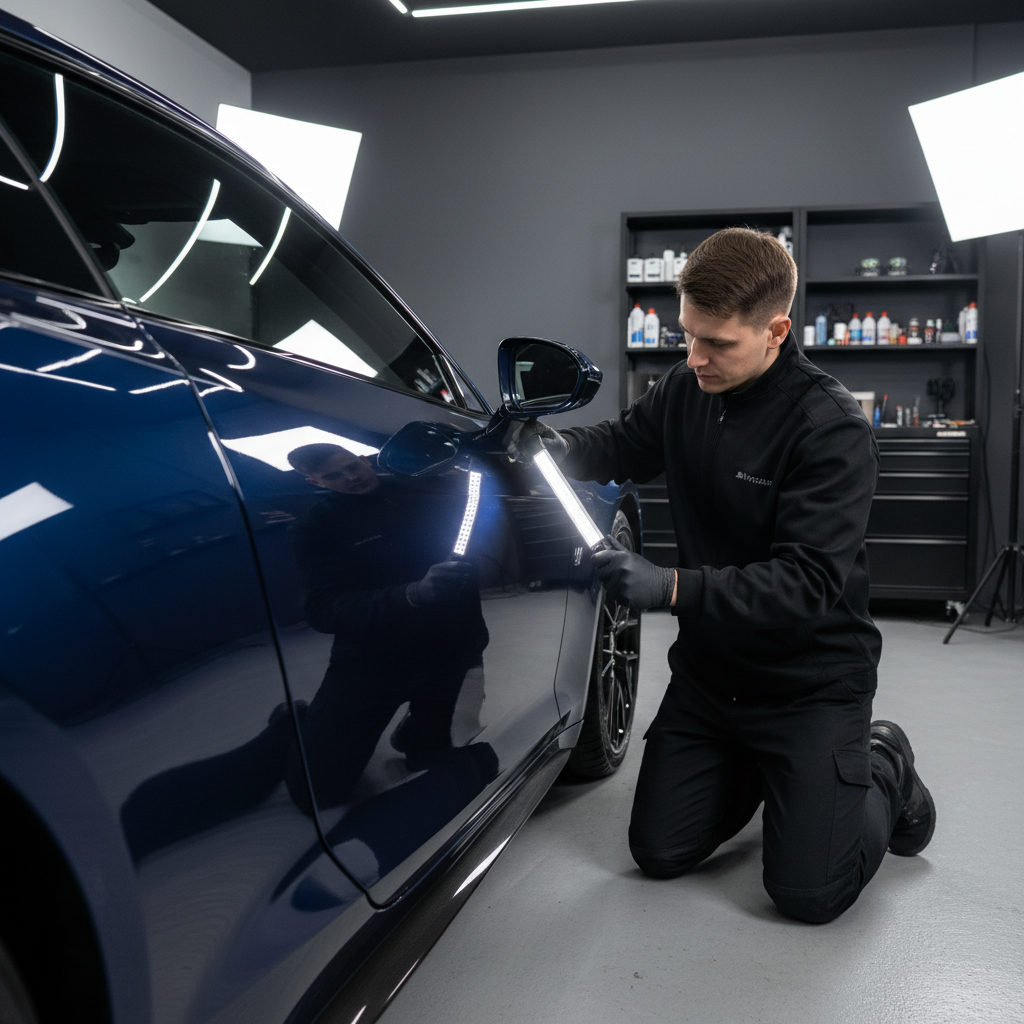
6) Wipe off and inspect with good lighting
Use clean microfiber. A bright handheld light helps reveal swirls. If residue smears, you may be using too much product or the panel may be warm.
7) Protect the paint
After correction, apply a sealant or wax. If you plan to use a consumer ceramic coating, read prep requirements carefully, sometimes you need a panel wipe step.
Common mistakes beginners make (and what to do instead)
Most “bad results” are not caused by the polisher itself, they come from setup choices and small technique issues that compound across panels.
- Mistake: skipping the test spot. Do instead: dial in one section, then repeat the same combo.
- Mistake: using a cutting pad everywhere. Do instead: start with a polishing pad, step up only where needed.
- Mistake: polishing dirty paint. Do instead: wash well, and decon if contamination is obvious.
- Mistake: tilting the pad to “get more bite”. Do instead: keep it flat, let pad and product do the work.
- Mistake: chasing deep scratches you can catch with a fingernail. Do instead: accept those may need sanding, touch-up, or professional correction.
According to OSHA, proper eye and respiratory protection may be appropriate when working with chemicals and airborne particulates. If you are sensitive to dust or working in a closed garage, consider a mask rated for particulates and keep ventilation in mind, and follow product safety labels.
When it makes sense to call a pro
DIY is great for swirls, light oxidation, and general gloss improvement. But a few scenarios justify professional help, even if you own the machine.
- Clear coat failure, peeling, or severe paint checking
- Unknown repaint history on a high-value vehicle
- Severe defects that likely need wet sanding
- You want paint thickness readings before aggressive correction
A reputable detailer can measure paint, set realistic expectations, and sometimes do a “one-step” correction that gets you 80% of the look with less risk. If you are unsure, a consultation is often cheaper than fixing a mistake.
Key takeaways and a practical 2026 recommendation path
If you remember nothing else, remember this: the best car polisher buffer for beginners is usually a dual action machine with a 5-inch setup, paired with a mild pad and polish that finishes clean.
- Buy: a quality DA polisher, 5-inch backing plate, 3 pads (polish, finish, optional cut), and good microfiber towels
- Do: one test spot, then repeat the same method panel by panel
- Avoid: heavy compounds as your first move, and avoid dry buffing a dirty panel
Plan one afternoon, do the hood and a fender, then decide if you want to finish the car the same day or split it into weekends. Consistency beats intensity here.
FAQ
What is the safest type of polisher for a first-time user?
A dual action random orbital is usually the safest starting point because it reduces heat concentration and is less likely to leave holograms than a rotary.
Is a 6-inch polisher pad okay for beginners?
It can work on flat panels, but many beginners find 5-inch pads easier on curves and tighter areas. If you already have 6-inch, you can still learn, just expect more edge management.
Do I need a compound, or is a polish enough?
Many daily drivers respond well to a medium polish or an all-in-one for a first correction. If your test spot barely changes, then consider compounding and finishing.
How do I prevent swirl marks while learning?
Wash safely, keep pads clean, use less product, and keep the pad flat. Swirls often come from contamination or bad wipe-down habits, not just the polishing step.
How many pads should a beginner buy?
At least two per pad type you plan to use is comfortable, because swapping to a clean pad keeps results consistent. If you only buy one, you will spend more time cleaning mid-job.
Can I polish a car with ceramic coating already on it?
Yes, but polishing will typically remove or weaken the coating on that area, so you may need to reapply protection. If you are unsure what is on the paint, start mild and test.
How often should I polish my car?
Most people do paint correction occasionally, not monthly. If you maintain with good washing and a topper sealant, you may go a long time before polishing again.
If you are shopping for your first setup and want a more “no surprises” path, focus on a dual action polisher kit that includes a 5-inch plate, a small pad variety, and a beginner-friendly polish, it is often the easiest way to get results without buying five extra items you will not use.