
The best stud finder for wall studs is the one that matches your wall type, your tolerance for false beeps, and how often you actually hang heavy stuff.
If you have ever tried to mount a TV or a set of shelves and hit nothing but drywall, you already know the real problem, wasted holes, wasted time, and that low-grade panic when you wonder if you just drilled near a wire.
This guide focuses on what matters in 2026 shopping, sensor types, scan depth, wire detection, calibration behavior, and the little workflow habits that make almost any decent tool feel “more accurate.”
What “best” really means for a stud finder in 2026
Most people want one thing, a clean stud center mark on the first pass. In practice, “best” tends to mean repeatable results, fewer false positives, and a wire warning you trust enough to slow down.
- Wall reality: modern homes can include irregular stud spacing, metal studs, insulation, double drywall, patch repairs, and textured surfaces.
- Job reality: a one-time picture hook needs less capability than a 70-inch TV, cabinets, garage racks, or a wall-mounted heater.
- User reality: some tools are “smart” but finicky, others are simple and forgiving, the best option depends on how patient you are.
One more thing, there is no scanner that can “see everything” in every wall with zero errors. You are choosing a tool plus a method.
Stud finder types (and why they behave differently)
Understanding the sensor style saves you from buying features you do not need, or expecting miracles from a basic unit.
Magnetic stud finders
These locate fasteners (nails or screws) in studs using a magnet. They are simple, cheap, and never need batteries, but they can be slower because you hunt for screw lines.
- Best when you want something reliable and minimal.
- Works nicely on drywall with typical fastener patterns.
- Less helpful in odd fastening layouts or heavy patchwork.
Electronic edge/center finders
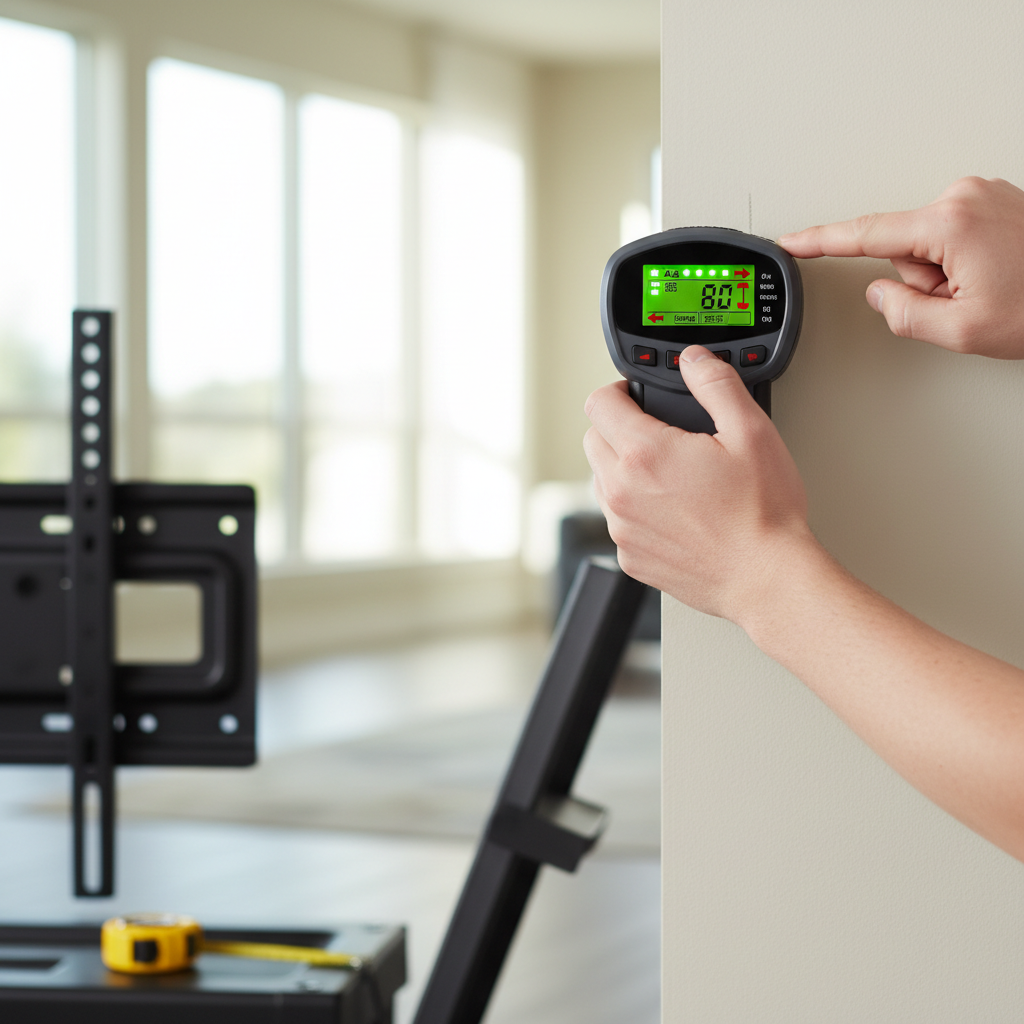
These sense density changes behind the wall, then estimate stud edges and center. They are the mainstream pick and often the best stud finder for wall studs for typical homeowners because they balance speed and usability.
- Good for standard 1/2-inch drywall on wood studs.
- Accuracy depends heavily on calibration and how you move.
- Cheaper models can chatter on lath, plaster, or textured walls.
Deep-scan and multi-sensor models
Usually electronic, but with deeper detection and sometimes multiple sensors to reduce “guessing.” Useful for thicker walls and tricky situations, though they can still struggle with plaster and messy cavities.
- Helpful for tile backer boards, double drywall, and thicker finishes.
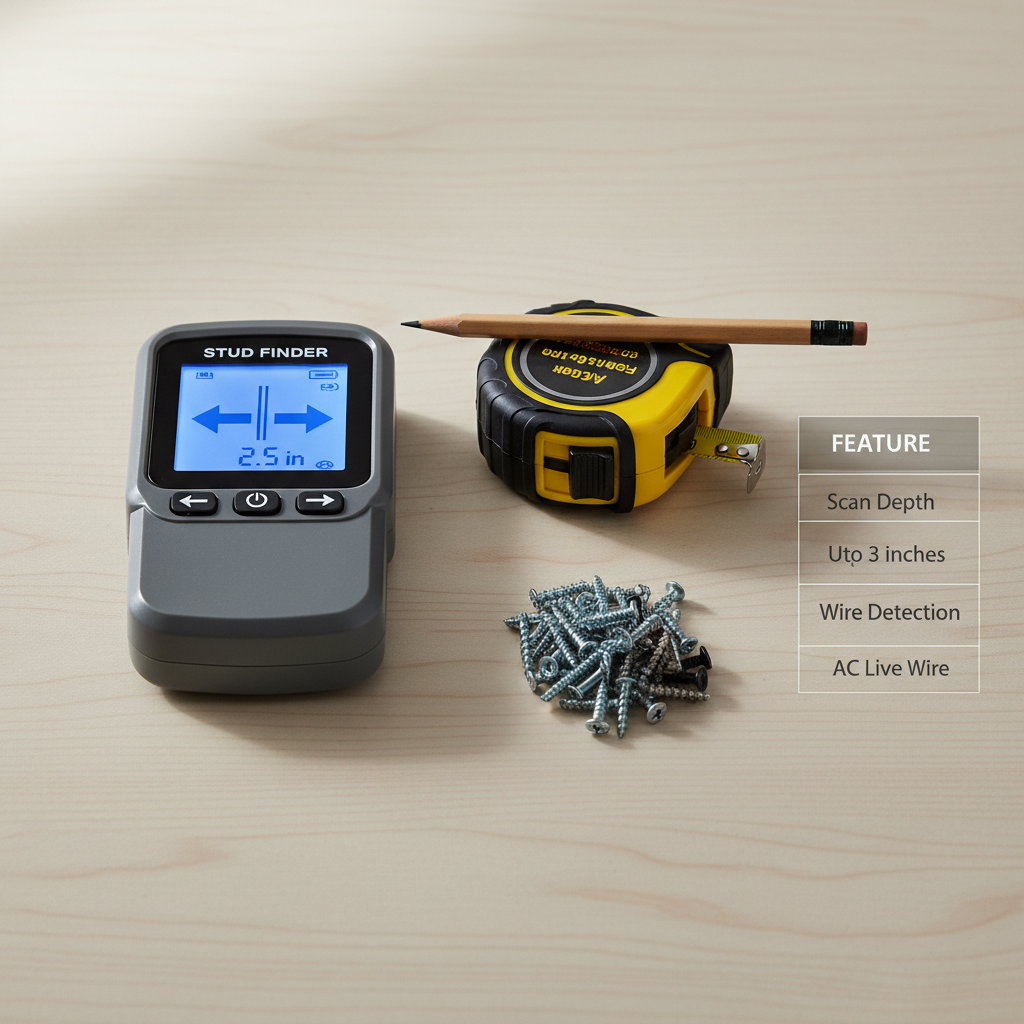
- Often adds AC wire detection and better guidance.
Wall scanners with “imaging” claims
Some higher-end scanners promise a more visual readout. They can be great, but they are also the easiest to misunderstand if you expect an X-ray. Treat them as guidance, then verify with multiple passes.
Quick comparison table: what to look for (and what to ignore)
Instead of chasing brand hype, compare features by how they change your odds of a correct mark.
| Feature | Why it matters | Who benefits most |
|---|---|---|
| Center-find mode | Marks stud center without you manually averaging edges | Most homeowners mounting TVs, shelves, mirrors |
| Deep scan (1.5–2 in.) | Helps through thicker walls, tile backer, double drywall | Remodelers, older homes, bathrooms/kitchens |
| AC live-wire warning | Prompts caution near energized wiring, not a guarantee | Anyone drilling deeper than a pilot hole |
| Multi-sensor array | Reduces false peaks and improves repeatability | People who hate “scan, beep, nope” cycles |
| Auto calibration | Faster setup, but you still need consistent technique | Beginners, occasional DIY |
| LCD guidance arrows | Helps you slow down and mark edges cleanly | Most users, especially on textured walls |
What to ignore? In many cases, flashy “modes” that you never use. A steady center reading beats ten toggles.
How to tell which stud finder you need (fast self-check)
If you are stuck deciding, this is the quickest way to narrow it down without overbuying.
- You live in a newer home, drywall feels standard: a decent electronic center finder usually works well.
- You have plaster, lath, or lots of texture: consider multi-sensor or pair an electronic unit with a magnetic finder for confirmation.
- You plan to mount heavy loads: prioritize repeatable center marks, deep scan, and a clear display you can read at awkward angles.
- You often work near outlets/switches: prioritize live-wire warning, then still drill cautiously.
- You do DIY once a year: get something simple that you will actually trust and use correctly.
According to CPSC (U.S. Consumer Product Safety Commission), electrical hazards are a common home safety concern, so it is worth treating any wire-detection feature as a caution flag, not permission to drill fast.
Real-world accuracy: why stud finders “miss” even when they are fine
Most “bad stud finder” complaints come from predictable situations, and you can often fix them with technique.
- Bad calibration spot: if you start directly over a stud, some models may “learn” that density as baseline.
- Moving too fast: electronics need a steady pace, rushing creates jumpy readings.
- One-pass trust: a single scan is not enough, especially near corners, windows, and plumbing walls.
- Wall anomalies: fire blocks, horizontal bracing, pipes, insulation clumps, or repairs can look like a stud.
- Metal studs: many units can detect them, but the readout can feel wider and less obvious.
If you want the best stud finder for wall studs to feel accurate, plan to scan, mark, re-scan from the other direction, then confirm.
Step-by-step: a repeatable method that reduces false positives
This is the workflow that tends to make even midrange tools behave better.
1) Pick the right mode before you touch the wall
- Standard scan for typical drywall.
- Deep scan only when you need it, it can be noisier.
- Wire warning on whenever you drill deeper than shallow anchors.
2) Start on “empty” wall, then move slowly
- Place the unit flat, start 6–12 inches away from where you expect a stud.
- Move horizontally at a steady pace, no rocking, no lifting.
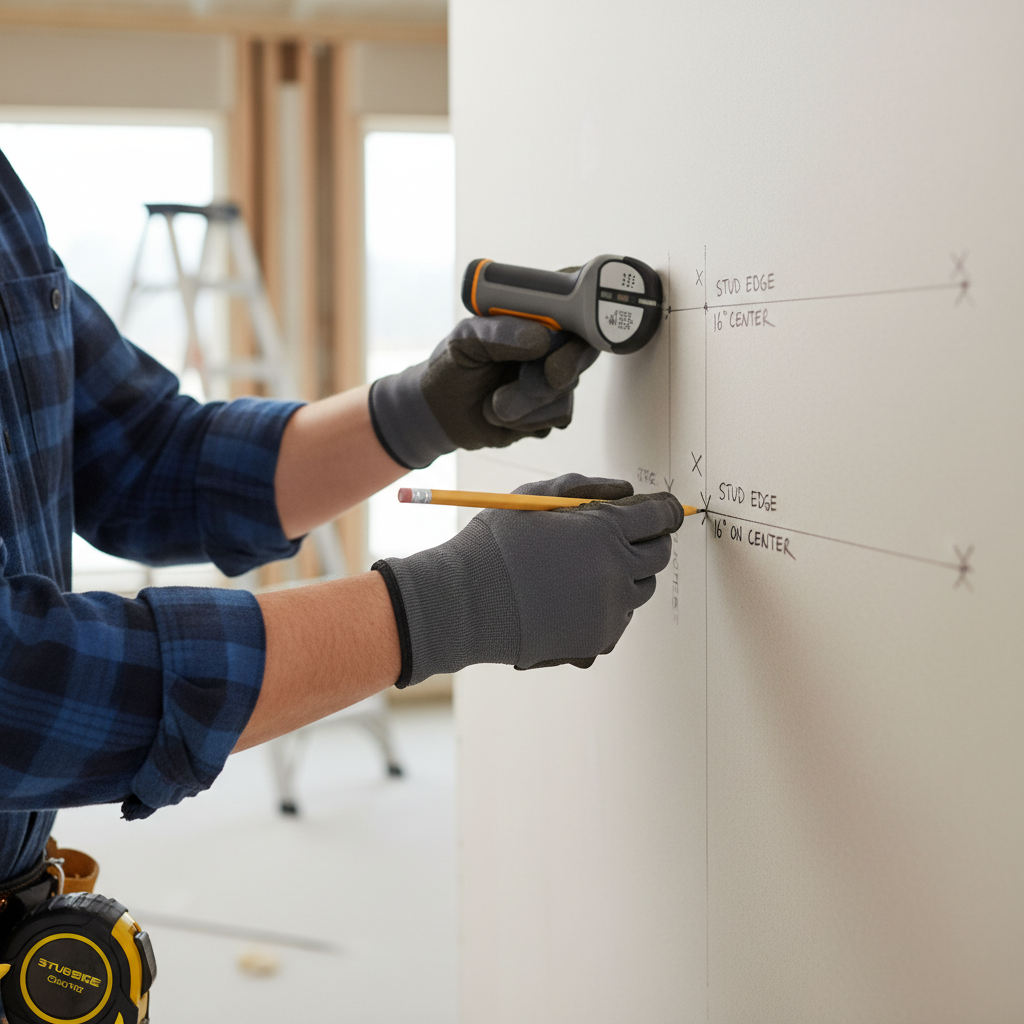
3) Mark both edges, then find center
- Mark left edge, keep moving until clear.
- Come back and mark right edge.
- Split the difference, that midpoint is usually your stud center.
4) Verify with spacing logic and a second pass
- In many U.S. homes, studs are often 16 inches on center, sometimes 24, but renovations can break patterns.
- Re-scan from the opposite direction, your center mark should land in the same place.
5) Confirm before committing to a big hole
- Use a small pilot hole, or a thin finish nail in a hidden spot if appropriate.
- If you hit air, stop and re-check, do not “chase the stud” with bigger holes.
Buying checklist: features that pay off for most homeowners
If you want a practical shopping list, these are the features that tend to reduce frustration without turning the tool into a gadget project.
- Clear center indication: a strong visual cue beats relying on sound alone.
- Consistent calibration behavior: auto-cal can be nice, but it should not drift when you lift and re-place.
- Deep scan you can toggle: useful for thicker walls, but you want standard mode for everyday scanning.
- Live-wire warning: treat as a safety prompt, then proceed carefully.
- Comfortable grip and flat base: wobble is the enemy of repeatability.
- Good return policy: walls vary, even a well-reviewed unit might not love your house.
For many people, the best stud finder for wall studs ends up being a midrange electronic model paired with a cheap magnetic finder in the drawer, that combo catches a lot of “is this real?” moments.
Mistakes to avoid (they waste the most time)
- Scanning near a corner and expecting normal readings: framing clusters and drywall seams can confuse sensors.
- Trusting wire detection as a green light: it is a warning system, not a locator, slow down and drill shallow when unsure.
- Skipping the re-scan: two passes from opposite directions often reveal false peaks.
- Overusing deep scan: more depth can mean more noise, use it only when needed.
- Mounting heavy loads on drywall anchors alone: for TVs and cabinets, hitting studs or using a rated mounting system matters.
According to OSHA, controlling hazards before you drill, cut, or fasten is a basic safety mindset, and in a home context that often just means taking an extra minute to verify your mark and avoid energized areas.
Conclusion: a simple way to choose and get better results
If you want fewer surprises, pick an electronic center finder with a readable display, add deep scan and live-wire warning if you work in kitchens, baths, or older walls, then use a two-pass marking method every time.
Your next step can be simple, decide what you mount most often, buy for that scenario, then practice on one open wall section before the “big” install. That small rehearsal is usually what makes a tool feel like the right one.