
how to unclog a vacuum cleaner hose usually comes down to one thing: restoring airflow without damaging the hose, seals, or motor.
When a hose clogs, the vacuum often sounds higher-pitched, the head stops picking up, and you can even smell a “hot dust” odor. Ignore it long enough and you risk overheating, cracked plastic fittings, or a stretched hose that never seals the same way again.
This guide walks you through a practical, low-drama approach, what to try first, what to avoid, and how to tell whether the clog lives in the hose, the wand, the floor head, or the filters.
Why vacuum hoses clog (and why the “fix” often fails)
Most clogs are not mysterious, they’re predictable. The trick is recognizing what kind of blockage you’re dealing with, because the wrong approach can shove the plug deeper.
- Hair + lint ropes that snag at bends, especially near the handle or where the hose meets the wand.
- Chunky debris like LEGO pieces, coins, paper clips, and bits of cardboard that wedge at connectors.
- Fine dust plus moisture that cakes into a stubborn mass, common after vacuuming baking soda, fireplace ash, or damp entry rugs.
- Secondary restrictions like a packed filter or full bin that “feels” like a hose clog, even when the hose is clear.
A lot of people jump straight to poking with a broom handle. Sometimes it works, but sometimes it splits the hose lining, loosens a cuff, or leaves the real blockage sitting in the floor head.
Quick self-check: confirm it’s the hose, not something else
Before you commit to disassembly, do a short diagnosis. It saves time and prevents you from chasing the wrong part.
Fast tests that usually tell the story
- Suction at the base: If your vacuum has a removable hose, detach it and feel suction at the machine’s port. Weak suction here points to bin/filter issues, not a hose plug.
- Hose-only test: With the hose attached, remove the wand/head and check suction at the hose end. Strong at the machine but weak at the end suggests a clog inside the hose.
- Listen for a whistle: A high whistle often means a narrow restriction rather than a full blockage.
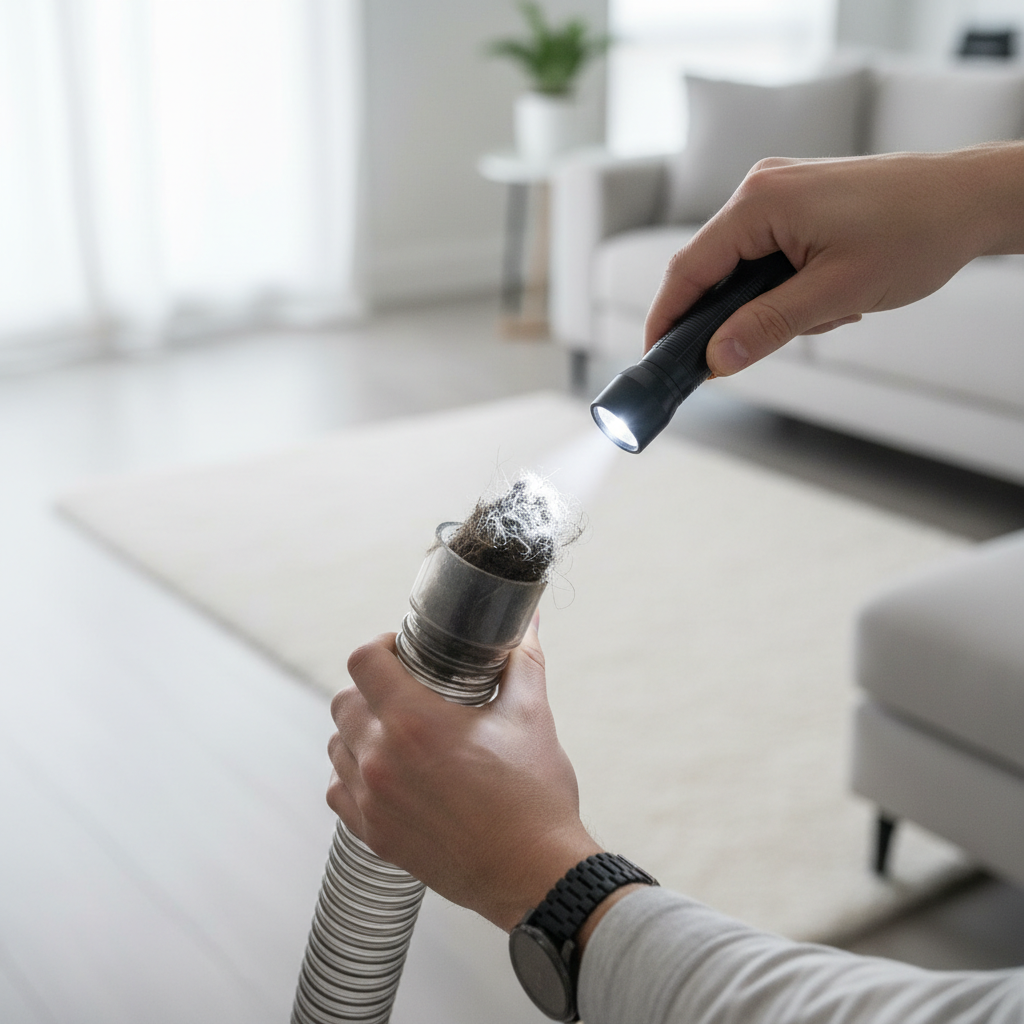
- Visual sweep: Shine a flashlight through the hose, bending it gently. Many clogs show up as a dark “knot,” especially near the curve points.
According to OSHA, unplugging equipment before servicing and keeping hands clear of moving parts reduces injury risk, even for everyday maintenance tasks.
Safety and prep: what to do before you start
how to unclog a vacuum cleaner hose is simple, but don’t skip the basics. A lot of cracked cuffs and blown seals come from rushing.
- Unplug the vacuum (or remove the battery for cordless units).
- Empty the bin/bag and check filters, because a “clog” can be airflow restriction upstream.
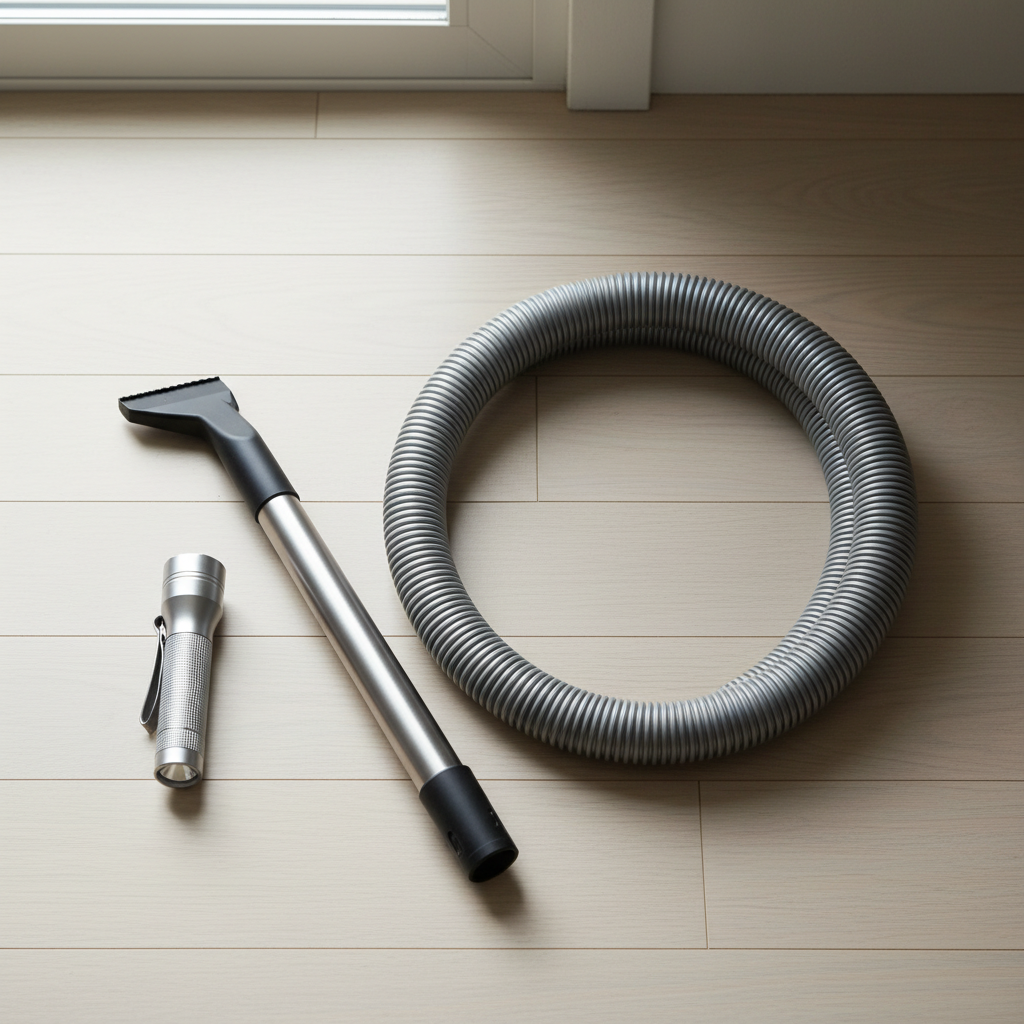
- Gather tools: flashlight, a straightened wire coat hanger (ends taped), a broom handle or flexible plumbing snake, scissors (for hair), and a microfiber cloth.
- Pick a cleanup spot you can vacuum later, clogs can drop dust balls and grit.
If your vacuum smells like burning plastic or the body feels unusually hot, let it cool and consider checking the manual for an overheat reset procedure.
Step-by-step: clear the clog without wrecking the hose
This is the sequence that tends to work in real homes, starting gentle and getting more aggressive only if needed.
1) Start with gravity and gentle flexing
Detach the hose if you can, hold it vertically, and gently tap along the length. Flex the hose slightly at the bend points while shining a light through, you’re trying to loosen the “knot,” not crush it.
2) Use a blunt pusher (not a sharp poker)
A broom handle can work if it’s smooth. Push from the end closest to the clog so you don’t compact it. If you use a coat hanger, tape the tip and avoid scraping the inner ribs.
- Good sign: the clog starts to move and you can shake it out.
- Bad sign: the hose bulges or you feel the plug jam harder, stop and change approach.
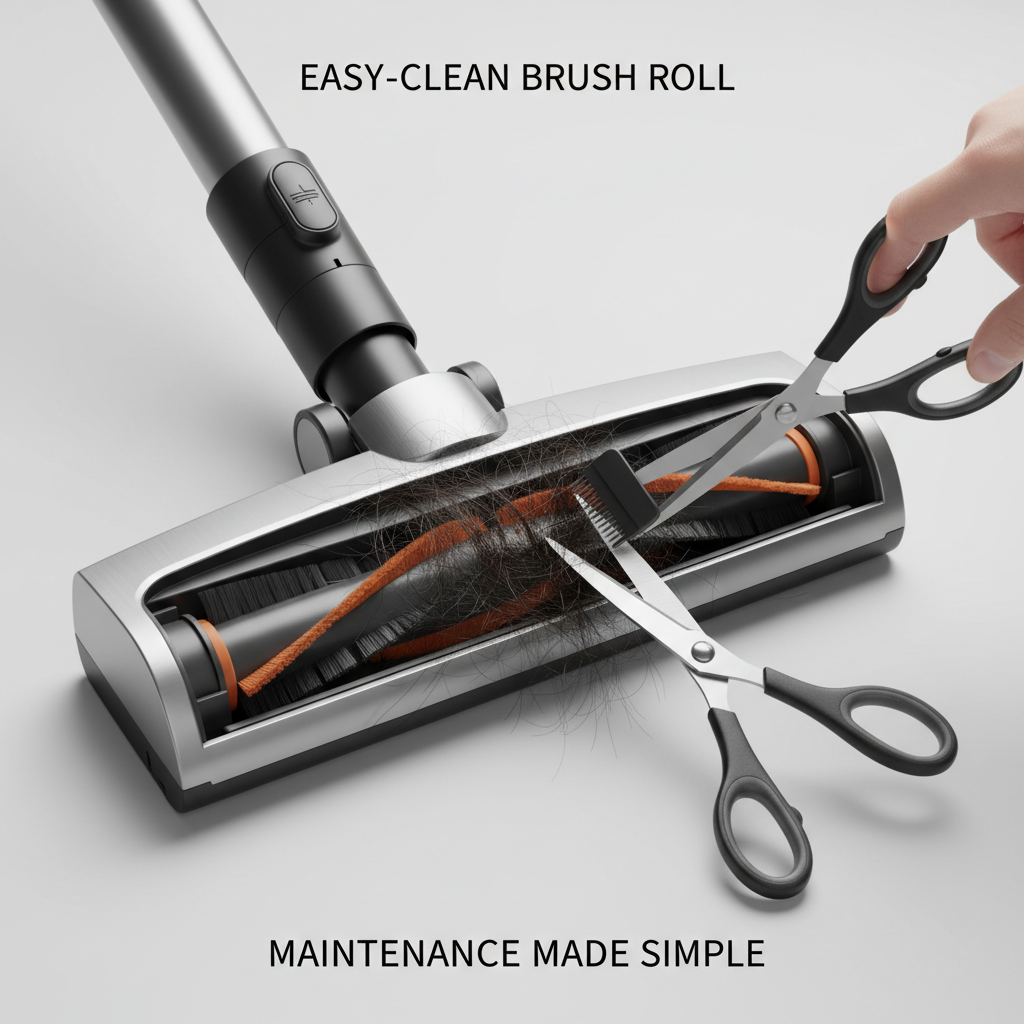
3) Break up hair ropes at the connectors
Many “hose clogs” are actually hair mats at the swivel or cuff. Remove the cuff if your model allows, then cut hair carefully with scissors. Avoid slicing the rubber gasket.
4) Try airflow reversal (when your vacuum supports it)
Some shop vacs and a few household units can blow air. If yours can, reverse airflow to push the clog back out the way it came. Do this outside or over a trash bag, it gets messy fast.
If none of that works, the blockage may be in the wand or floor head. That’s common, and it’s why this next section matters.
Hose vs wand vs floor head: where clogs hide most often
Here’s a quick way to stop guessing. A clog can live in more than one spot, especially after vacuuming shredded paper or pet hair.
| Location | Typical symptoms | What usually clears it |
|---|---|---|
| Hose mid-section | Whistling, suction drops at hose end | Flashlight locate + blunt push + shake-out |
| Hose cuff / swivel | Intermittent suction, rattling | Disassemble cuff, remove hair/debris, re-seat gasket |
| Wand (straight tube) | Feels “solid” when you look through it | Long stick or snake, push straight through |
| Floor head / brush roll area | Poor pickup on carpet, brush slows | Remove bottom plate, clear hair and clumped debris |
| Filter/bin restriction | Weak everywhere, dusty smell | Empty bin, clean/replace filters per manual |
According to the U.S. Consumer Product Safety Commission, following manufacturer instructions for maintenance and using products as intended can help reduce hazards in the home, which applies to vacuums and their attachments too.
Common mistakes that make clogs worse
Some moves feel logical in the moment and still backfire. If you’ve tried a few times and the suction keeps falling off, one of these might be happening.
- Pushing the clog deeper by jabbing from the wrong end.
- Using water inside the hose on units not designed for wet pickup, moisture can cake dust and may create odor or mold risk.
- Skipping filter checks and blaming the hose for everything, clogged filters mimic hose blockage.
- Reattaching parts slightly crooked so air leaks at the cuff, suction “feels” weak even when the hose is clear.
- Vacuuming forbidden stuff like ash, drywall dust, or big clumps of pet litter without the right model and filtration.
If you’re unsure whether your vacuum can handle fine dust (like drywall), it’s safer to check the manual or use a shop vac rated for that job.
Prevent future clogs (without babying your vacuum)
You don’t need to treat your vacuum like a museum piece, but a few habits prevent most blockages and keep suction consistent.
- Do a quick “big stuff” pass on kids’ rooms and entryways, coins and small toys are repeat offenders.
- Cut hair off the brush roll every couple of weeks if you have pets or long hair in the house.
- Clean or replace filters on schedule, most models lose performance long before they look “dirty.”
- Empty the bin early, packed bins tumble debris into the hose more easily.
- Use the right attachment for upholstery and tight corners, forcing debris through the wrong head creates jams.
Key takeaway: how to unclog a vacuum cleaner hose gets easier when you stop the clog at the source, hair mats and small hard objects near the connectors.
When to stop DIY and consider repair or replacement
Some problems look like clogs but are really mechanical or electrical. In these cases, pushing harder rarely helps.
- Persistent burning smell or repeated overheating, the motor or belt may be stressed.
- Cracked hose ribs or loose cuffs that won’t seal, you may need a replacement hose or gasket.
- No suction anywhere after filters/bin are confirmed clean, there may be an internal blockage or motor issue.
- Cordless units shutting off quickly even after clearing airflow, battery or electronics could be involved.
If your vacuum is under warranty, it’s often smarter to use authorized service rather than forcing disassembly that could affect coverage. When in doubt, a local vacuum repair shop can usually diagnose airflow vs motor problems quickly.
Practical wrap-up and a simple action plan
If you want a clean, repeatable process, keep it simple: confirm suction at the base, locate the blockage with light, clear it gently from the closest end, then check the wand and floor head before you declare victory.
Try this today: do the 60-second flashlight check and filter check, then clear connectors and the floor head. In many homes, that’s where suction comes back without any heroic effort.